
The procedures, exercises, and techniques for implementing a proper marksmanship program are based on the concept that all machine gunners must understand common firing principles, be proficient marksmen, and be confident in applying these skills in combat. This depends on their understanding of the machine gun and their application of marksmanship fundamentals. Proficiency is accomplished through practice that is supervised by qualified trainers and through objective performance assessments by the unit leaders. The structure of this chapter is in four sections: planning, fundamentals, basic marksmanship, and advanced gunnery. All advanced exercises are conducted under conditions that are as much like tactical conditions as possible. (See Appendix B for training aids and devices.)
The planning of MG training is no different from other marksmanship training. Guidelines are provided to assist the trainers in understanding, preparing, and ensuring that all training is conducted to standard. This section addresses the objectives, the responsibilities of the commanders, and the phases of training. It also introduces the training devices that assist in training, and designates when remedial and sustainment training should be conducted.
The objectives of the MG training program are to guide the trainers, leaders, and gunners through a sequence of training to standard that produces a gunner who is able to maintain the gun and effectively engage targets in combat.
The responsibilities of the commander are to ensure the instructors and their assistants are thoroughly trained and rehearsed in the planning, knowledge, and presentation of all MG training. He will ensure that safety is emphasized and never overlooked during training. Serviceable weapons are a must for good training and commanders must make sure they are used properly. He also ensures sufficient time is scheduled.
The initial training strategy is divided into three phases of marksmanship instruction--the fundamental phase, the basic marksmanship phase, and the advanced gunner phase. Gunner safety is continuously stressed during all phases of training.
a. In the fundamental phase, the gunner learns the necessary common skills, such as dry-fire exercises, preparation of positions, manipulation of the T&E, range determination, and sighting and aiming. The gunner must master these skills before he is allowed to progress to the basic marksmanship phase.
b. During the basic marksmanship phase, the gunner learns the basics of loading, zeroing, laying, and engaging of single and multiple targets from the tripod and vehicle mode.
c. The advanced gunnery phase trains the gunner in engaging moving targets, night firing, NBC firing, mounted firing, and firing using fire commands. The gunner will be placed under the stress and strain of simulated combat conditions.
Once individuals and units have trained to a required level of proficiency, leaders must structure collective and individual training plans to conduct critical task training at the frequency necessary for the sustainment training strategy. Mission training plans and individual training evaluation programs help achieve and sustain collective/individual proficiency. Sustainment training prevents skill degradation. Army units must be prepared to accomplish their wartime missions at any time--they cannot rely on infrequent peaking to the appropriate level.
Remedial training will be conducted in any of the phases of training where the gunner does not meet the standard. The trainer must be instantly aware of any gunner that seems to be having trouble. Once the problem has been identified, the gunner should be retrained as soon as possible so that he will maintain the same level of proficiency as the other gunners.
The fundamentals are necessary basic skills that a gunner must be trained in before he can be expected to effectively engage targets. Personnel conducting marksmanship training must fully understand the fundamentals and be well rehearsed in applying them. The basics in MG training are assuming a proper firing position, sighting, aiming, determining range, and manipulating the T&E mechanism.
Before a gunner can hit targets, he must learn to get behind the weapon in a position that allows him to be comfortable, affords him protection, and enhances mission accomplishment.
a. The tripod firing positions are prone, sitting, and standing. They are assumed in the following manner.
(1) The prone position is used when firing from the tripod that is set in a low position. It is assumed by lying on the ground directly behind the gun. The gunner then spreads his legs a comfortable distance apart with his toes turned outward. His left elbow rests on the ground, and his left hand grasps the elevating handwheel of the T&E. His right hand lightly grasps the right spade grip with his right thumb in a position to press the trigger. The position of his body can then be adjusted to position his firing eye in alignment with the sights of the weapon (Figure 5-1).
(2) The sitting position can be used when the tripod is set in a high or low position. The gunner sits directly behind the gun between the legs of the tripod. He may extend his legs under the tripod or cross them, depending on his physique. The gunner then places both elbows on the inside of his thighs to get the best support. He grasps the elevating handwheel of the T&E with the left hand, and lightly grasps the right spade grip with his right hand. He must ensure that the right thumb is in position to press the trigger (Figure 5-2).

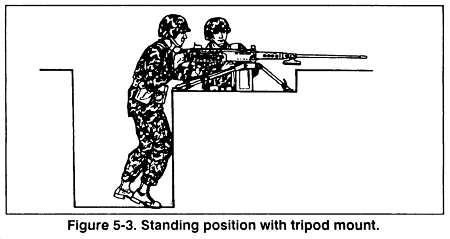
(3) The standing position is used when the gunner is firing from a fighting position. This position is assumed by standing directly behind the gun with the feet spread a comfortable distance apart. The gunner grasps the elevating handwheel of the T&E with the left hand. He lightly grasps the right spade grip with the right hand, ensuring that the right thumb is in a position to press the trigger. Adjustment of the body is allowed in order to align the firing eye with the sights on the weapon (Figure 5-3).
b. The vehicular firing position for the MG is standing. It is assumed by constructing a solid platform to stand on, using sandbags or ammunition boxes; or, in the case of the M113 APC, using the commander's seat. The gunner must then ensure that his platform is high enough to place the spade grips of the gun about chest high. He grasps the spade grips with both hands and places both thumbs in a position to press the trigger. The gunner holds the gun tightly to his chest for stabilization; his elbows should be locked tightly to his sides. He sights over the weapon and adjusts his position by flexing his knees and leaning forward to absorb any recoil (Figure 5-4).

c. The antiaircraft firing position uses a standing position when firing from the M63 mount. To assume the position, the gunner stands with his feet spread comfortably apart with his shoulders squarely behind the gun (Figure 5-5). When the gunner is engaging aerial targets, he grasps the upper extension handles with both hands. When engaging low-level aircraft or ground targets, he grasps the lower extension handles with both hands.

NOTE: The kneeling position may be used; it has the advantage of presenting a lower profile of the gunner and also aligns the gunner's eye closer to the axis of the barrel.
Dry-fire training is designed to teach the gunner the essentials of MG gunnery, including safety. Dry-fire training also includes sighting, aiming, sight setting, laying, manipulating the gun, manipulating the T&E mechanism, and determining the range. Thorough, carefully supervised training of these essentials is necessary to conserve time and ammunition during live fire. Practical exercises should be used to determine gunners' proficiency. Mastery of these skills is a must before the gunner is allowed to move on to the next phase of training. Practice is a must to achieve mastery.
a. Sighting and Aiming. Sighting is the ability of the gunner to use correct sight alignment and correct sight picture to engage targets.
(1) The first step in proper sighting is finding a natural, comfortable spot where the gunner is able to see the front sight blade through the rear peep sight. It is important the gunner understands that the spot he chooses to sight from must be constant throughout his firing.
(2) The second step in sighting is to move the weapon until the top center of the front sight blade is exactly in the center of the rear sight peep hole. The gunner can achieve this by drawing imaginary lines that bisect in the center of the rear peephole and then placing the top of the front ight blade center of them. This is correct sight alignment (Figure 5-6).

(3) The third step is to establish correct sight picture. To perform this task, the gunner adjusts the weapon until the top center of the front sight blade is bottom center of the intended target. Correct sight picture is a combination of sight alignment and placement of point of aim (Figure 5-7).

b. Range Setting and Laying. Range setting and laying the gun are important elements in marksmanship training. It is this training that prepares the gunner to accurately and rapidly place fire on his target in combat. To properly set ranges, the gunner must be trained in rear sight operation.
(1) Setting ranges on the rear sight is a simple but important task. The gunner just has to rotate the elevating screw knob in a clockwise manner to move the peep sight up or counterclockwise to move it down. The range scale on the left is graduated in mils and the scale on the right in yards. The gunner must align the hairline index of the peep sight with the scale index line at the desired range as quickly and accurately as possible.
(2) Laying is placing the barrel of the weapon on a direct line with the target, using the sights. This must also be done as quickly and accurately as possible.
(3) The range setting and laying exercises are designed to require the gunner to practice and the instructor to evaluate both correct sight alignments and correct placements of aiming points. The exercise starts with the gunner in the sitting firing position with rear sight down. The coach will announce a range and general aiming point. The gunner will then repeat the range and direction of target. The coach will then announce, "Begin." The gunner will then raise and set his sights, and align the weapon on the aim point. When the gunner completes this task, he will announce "Up." The coach will then get behind the weapon and check the range setting and aim point and critique the gunner on his findings. This exercise will be continued until speed and accuracy is obtained.
c. Traversing and Elevating Mechanism. Manipulation of the T&E mechanism (Figure 5-8) is another key factor in effectively engaging targets. The gunner is taught how to instinctively manipulate the T&E mechanism to shift from one target to another. The gunners are trained to use the traversing handwheel, the traversing slide lock, and the elevating handwheel.

(1) The traversing mechanism consists of a traversing handwheel, locking nut, scale, and yoke. The T&E mechanism is attached to the traversing bar of the M3 bipod.
(a) The traversing bar is graduated in 5-mil increments and fits between the trail legs of the M3 tripod. The traversing slide and screw assembly are clamped in place on the traversing bar by the traversing slide lock lever. When the traversing slide is locked to the traversing bar, the traversing handwheel should be centered. The traversing slide is properly mounted when the lock lever is to the rear and the traversing handwheel is positioned to the left.
(b) To make changes in direction, loosen the traversing slide lock lever and move the slide along the traversing bar. This permits traverse of 400 mils left or right of the zero index in the center of the traversing bar. Readings on the traversing bar are taken from the left side of the traversing slide. For changes of 50 mils or less in deflection, turn the traversing handwheel. This allows a traverse of 50 mils left or right of center. One click in the traversing handwheel signifies 1 mil change in direction.
(2) The elevating mechanism consists of an upper and lower elevating screw, which is connected to the gun by inserting the quick release pin assembly through the holes in the upper elevating screw yoke and the rear mounting lugs of the receiver. A scale, graduated in mils, is fitted to the upper screw to indicate elevation. This scale is marked to show (-) minus 250 mils in depression and ( + ) plus 100 mils in elevation from the zero setting.
(3) The elevating handwheel is graduated in 1 mil increments from 0 to 50 mils and is fastened to the elevating screw by a screw lock. This synchronizes the handwheel graduations with those on the upper elevating screw. A spring-actuated index device produces a clicking sound when the handwheel is turned. Each click equals 1 mil change in elevation. The handwheel is turned clockwise to depress the barrel and counterclockwise to elevate.
(4) Direction and elevation readings constitute the data necessary to engage preselected target areas during limited visibility. These readings are measured by and recorded from the traversing bar and the T&E mechanism. To obtain accurate readings, the T&E must be first zeroed with all measurements recorded in mils.
(a) To zero the traversing handwheel, the gunner must first hold the T&E so that the traversing handwheel is on his left as he looks at it. He then turns the handwheel toward himself until it stops, loosens the locking nut slightly, and aligns the zero on the scale with the zero on the elevating screw yoke. Once the zeros are aligned, he tightens the locking nut. He must then turn the handwheel two complete turns away from the body and stop. The scale should again be on the zero. If this procedure is done at night, the gunner will turn 50 clicks away from him.
(b) To zero the elevating handwheel, the gunner must first turn the handwheel up or down until the handwheel is level with the line directly under the zero on the elevating screw plate scale, and the elevating handwheel indicator is pointing to the zero on the top of the handwheel. The elevating mechanism sleeve is then rotated up until it is stopped by the handwheel. The gunner then rotates the sleeve down until it stops, making sure he counted each complete rotation. He then divides the number of rotations by two, rotates the sleeve back up that number, and stops. The T&E mechanism is now ready to be attached to the tripod.
(c) To obtain and record direction readings, the gunner sets the sight on the proper range to hit the target, loosens the traversing slide lock lever, and slides the T&E mechanism along the traversing bar until the weapon is sighted on the aiming point of the target. The T&E mechanism is then locked down by tightening the traversing slide lock lever. All readings are taken from the left side of the sleeve mechanism. If the left side of the sleeve is not exactly on one of the 5-mil tick marks, the gunner must slide the sleeve to the next smaller tick mark to align it exactly. The traversing handwheel is then used to move the weapon back on point of aim. The direction is now ready to be recorded. The reading is taken from the number on the traversing bar and the direction from the direction of the barrel of the weapon. If the sleeve mechanism is on the right side of the zero on the traversing bar, then the reading is left; if it is on the left side of the zero, then it is a right reading. The width of a target may also be measured and recorded by first moving the traversing handwheel until the sights are aligned with the right or left side of the target. The clicks required to do this measure the width.
NOTE: Before repositioning the weapon for another target, the gunner must realign the handwheel.
(d) To obtain an elevation reading, the gunner must first ensure that the sights are aligned and at the desired aim point of the target. The elevation reading is made up of two portions, a major reading and a minor reading. The major reading is taken from the elevating screw plate scale. The scale is graduated in 50-mil increments and ranges from a minus (-) 250 mils to a plus ( + ) 100 mils with a zero between them. There is an index line below each number and a plus or minus sign above each number, with the exception of the zero. The zero does not have a plus or minus sign. To obtain the elevation reading, the gunner should lower his head until his eyes are level with the elevating handwheel. The major reading is the first number with a plus or minus sign, with its index line just visible above the elevating handwheel. The minor reading is taken from the top surface of the elevating handwheel. It is graduated in l-mil increments for a total of 50 mils. The handwheel is also equipped with an indicator that points to each number on the handwheel as it is turned. Once the gunner has the major reading from the screw plate scale, he will then get the minor reading by looking at the number at which the indicator is pointing. Both portions of the elevation reading are recorded by placing a slash (/) mark between the two portions.
(e) An elevation reading is valid only on one T&E mechanism. If the same data is placed on another T&E mechanism using the same weapon, the data may be inaccurate. The number of threads exposed on the T&E must remain the same both when obtaining and recording data. If the number of exposed threads is changed in any manner, the firing will be off target. For example, when a gun is freed to engage targets in the secondary sector, the data will be correct if the gunner ensures that the same amount of threads is exposed when he returns to his primary sector of fire.
(f) To ensure that the data is correct, the gunner should fire and adjust his weapon.
(5) The T&E manipulation exercise gives the gunner practice and the instructor a tool to evaluate the gunner's progress (Figure 5-9). The exercise is conducted in two stages. Both stages require the coach to give directions and the gunner to respond. In the first stage, the coach positions himself about 10 paces to the front of the gun. He then directs the gunner to manipulate the weapon in certain directions. He indicates the direction by the use of hand signals. The gunner responds by manipulating the T&E mechanism with his left hand. The gunner must keep his eyes on the coach; at no time during this exercise is he permitted to look at the T&E mechanism. The coach must be very attentive during the first stage because the gunner will be manipulating using the elevating handwheel and the traversing handwheel. The second stage is done in the same way except the gunner must make bold changes in elevation and deflection. The exercise continues until the instructor is satisfied that the gunner can manipulate the weapon by T&E without looking at the device. This exercise can also be conducted using the basic MG target. The gunner will be shifted from one selected target to another. The coach must observe all movements of the gunner during this training.

Range determination is the process of estimating the distance to a target from a gunner's position. The ability of the gunner to get the range to, sight on, and destroy a target is the realism of combat. Under combat conditions, ranges are seldom known in advance; therefore the effectiveness of fire depends largely upon the accuracy and speed of the gunner in determining range. Some methods of determining range are estimating by eye (Table 5-1), firing the gun, measuring range from a map or aerial photograph, stepping off the distance, or securing information from other units. Ranges are determined to the nearest 100 meters for machine gun firing. In combat, the most commonly used methods are estimating by eye and firing the gun. There is also a method used for measuring lateral distance.

a. The two techniques of eye estimation are the 100-meter unit of measure method and the appearance of objects method.
(1) When using the 100-meter unit of measure method, the gunner must be able to visualize what 100 meters looks like on the ground. With this distance in mind, the gunner can mentally determine the number of 100-meter units between his position and the target. The accuracy of this method is limited to 500 meters or less, and it requires constant practice (Figure 5-10).

(2) For targets that appear to be more than 500 meters, the gunner must modify this technique. The gunner selects what he thinks is the halfway point between the target and his position. He then mentally counts the number of 100-meter units to the halfway point and doubles it. This method of range determination is not accurate beyond 1,000 meters (Figure 5-11).

(3) Some terrain affects the appearance of 100-meter units of measure. When the terrain slopes upward toward the target, 100 meters appears longer than on level terrain. It appears shorter on downward sloping terrain. The gunner must consider these two factors when using the 100-meter unit of measure method.
(4) The appearance of objects method may be used if the gunner is unable to use the 100-meter unit of measure method because of terrain. To use this method, the gunner learns through practice how familiar objects look at various known ranges. This can be achieved by studying the appearance of a man standing 100 meters away. The gunner must then fix the appearance of the man firmly in his mind to include the size and details of his uniform and equipment. Next, he studies the same man at the same distance in the kneeling and prone positions. This procedure is used at 200, 300, 400, and 500 meters. By comparing the appearance of the man at these known ranges, he can establish a series of mental images that will help him determine range on unfamiliar terrain out to 500 meters. This training could also be conducted to familiarize the gunner with other objects, such as weapons and vehicles, at various ranges.
b. Firing the gun is another method of determining range. In this method, the gunner opens fire on the target at the estimated range and moves the center of the beaten zone into the center base of the target by means of the T&E handwheels. He resets the sight so the new line of aim is at the center base of the target and notes the range setting on the rear sight. This range setting may apply only to this gun. When the ground in the vicinity of the target does not permit observation of the strike of the rounds, or when surprise fire on the target is desired, fire is adjusted on a point that offers observation and is known to be the same range as the target. The gunner then lays his gun on the target when ordered. When moving into position occupied by other units, range cards prepared by those units can furnish valuable range information on targets, suspected targets, and various terrain features. When the tactical situation and time permit, range may be determined by pacing off the distance.
c. Lateral distance measure is a method that the gunner may use to determine the distance from one target to another from left to right or right to left. When the gun is mounted on the M3 tripod, width can be measured by aiming on a point and manipulating the traversing handwheel, counting the clicks from one point to another point of aim. Each click equals one meter at 1,000 meters or one-half meter at 500 meters. This method is accurate but time-consuming. The finger measurement method is not a method of range determination; it is a method of measuring the lateral distance (in fingers or mils) between two points. To measure the distance in fingers between a reference point and a target, extend the arm with palm outward, the fingers cupped, and elbow locked. Close one eye, raise the index finger, and sight along its edge, placing the edge of the finger along the flank of the target or reference point (Figure 5-12). The remaining space is then filled in by raising fingers until the space is covered. The measurement is then stated as being one or more fingers or so many mils, depending on the number of fingers used (Figure 5-13).


The purpose of observation and adjustment of fire practice is to teach the adjustment of fire by observing the strike of the bullets and the flight of the tracers, or by frequent re-laying on the target using sights.
a. Observation is used when firing on the 10-meter range because the impact of the round is visible on the target. When firing at greater distances, the strike of the round on the ground may cause dust to rise that is visible to the gunner; however, during wet weather, the strike cannot always be seen. In this case, use tracer ammunition that allows the gunner or crew to note the strike of the burst in relation to the target.
b. Adjustments on the target can be made using the mil relation; that is, one click of traversing or elevating handwheel moves the strike of the round one-half inch on the target at 10 meters. When firing on field targets, adjustment is made by moving the burst into the target. One click of traverse will move the strike of the round one-half meter at 500 meters, or one meter at 1,000 meters (Figure 5-14). However, the distance one click of elevation will move the strike of the round depends on the range to the target and the slope of the ground. The gunner determines the number of mils necessary to move the center of the strike into the target, and he manipulates the gun the required number of mils. This does not require the use of sights. For example, should the gunner fire on a target at 500 meters and observe the strike 10 meters to the right of the target and short about 50 meters, he would traverse the gun to the left 20 clicks (mils) and add one or more clicks (mils), depending on the slope.

c. The gunner may use the adjusted aiming point method to adjust the fire. In this method, the gunner must use his sights. He selects an aiming point that will place the next burst on target. For example, when the gunner fires on a target at 500 meters and estimates that the rounds impacted 20 meters short and 10 meters to the right, he would rapidly select an aiming point about 20 meters beyond the target and 10 meters to the left of it and lay on that aiming point and fire (Figure 5-15).

Fire commands are technical instructions issued by a leader to enable the unit or crew to accomplish a desired fire mission. Fire commands have been standardized for infantry direct fire weapons, and they follow the same sequence. There are two types--initial fire commands, issued to engage a target; and subsequent fire commands, which are issued to adjust fire, change the rate of fire, interrupt fire, shift fire to a new target, or to terminate the alert. A correct fire command is one that is as brief as clarity permits and yet includes all the elements necessary for the accomplishment of the fire mission. It is given in the proper sequence, transmitted clearly at a rate that permits receipt and application of instructions without confusion.
a. Elements of the Initial Fire Command. There are six essential elements of the initial fire command for the machine gun, which are given or implied by using one or more of the methods of control. During training, the gun crew repeats each element as it is given. This is done to avoid confusion and to train the crew to think and act in the proper sequence. The six elements are the alert, direction, description, range, method of fire, and the command to open fire.
(1) Alert. This element brings the crew to a state of readiness to receive further instructions. Once alerted, the gunner ensures the gun is loaded. The assistant gunner continuously checks with the leader for orders or instructions and passes them on to the gunner. The oral alert is announced as FIRE MISSION. At this command, the gunners are alerted that a target has been detected and fire may be delivered upon it. When the leader announces the alert, such as FIRE MISSION, both gun crews react to the alert. If only a certain gun is to engage, the leader announces NUMBER 1 (or 2). The other crew follows the fire mission, loads, and lays on the target to take up the fire, if required.
(2) Direction. This element indicates the general direction to the target and may be given in one or a combination of the following ways:
(a) The leader gives the direction orally to the target in relation to the position of the gun(s). For example, FRONT, RIGHT FRONT, LEFT FRONT.
(b) The leader can designate a small or obscure target by pointing with his arm and hand or aiming the machine gun. When pointing with his arm and hand, a man standing behind him should be able to look over his shoulder and sight along his arm and index finger to locate the target. When a gun has been aimed at a target, a soldier looking through the sights should be able to see the target.
(c) Tracer ammunition is a quick and sure method of designating a target that is not clearly visible. When using this method, the leader should first give the general direction to direct the gun crew's attention to the desired area. To minimize the loss of surprise when using tracer ammunition, the leader does not fire until he has given all the elements of the fire command except the command to fire. The leader may use his individual weapon or fire one or more bursts from the machine gun. The firing of the tracer(s) then becomes the last element of the fire command and is the signal to open fire. For example:
FIRE MISSION.
FRONT.
BUNKER.
WATCH MY TRACER(S).
SLOW (or SINGLE SHOT).
The leader fires his individual weapon or a machine gun at the enemy bunker, then his gun crew(s) opens fire.
(d) Another method of designating obscure targets is by using easily recognizable reference points. Prominent terrain features and man-made objects make good reference points. All leaders and members of the crew(s) must be familiar with the terrain features and the terminology used to describe them. The general direction to the reference point should be given. For example:
FIRE MISSION, NUMBER 2.
FRONT.
REFERENCE: LONE PINE TREE.
TARGET: TRUCK.
Sometimes a target must be designated by using successive reference points. For example:
FIRE MISSION, NUMBER 1.
RIGHT FRONT.
REFERENCE: RED-ROOFED HOUSE, LEFT TO HAYSTACK,
LEFT TO BARN.
TARGET: MACHINE GUN.
Finger measurements can be used to direct the gun crew's attention to the right or left of reference points. For example:
FIRE MISSION.
LEFT FRONT.
REFERENCE: CROSSROAD. RIGHT FOUR FINGERS.
TARGET: LINE OF TROOPS.
When the guns are mounted on tripods, lateral distance from reference can be accurately announced. When gunners are firing the tripod-mounted gun, lateral distance is assumed to be in mils unless otherwise indicated, so the word "mils" is not necessary. For example:
FIRE MISSION.
FRONT.
REFERENCE: KNOCKED-OUT TANK. LEFT FOUR ZERO.
TARGET: COLUMN OF TROOPS.
(3) Description. The target description is used to create a picture of the target in the minds of the gun crew. The gun crew must know the type of target they are to engage to properly apply their fire. The leader should describe it briefly but accurately. For example:
|
|
|
|
|
|
|
|
|
|
If the target is obvious, no description is necessary. Finger measurements or mil measurements can be used to designate the width of a linear target when the flanks cannot be pinpointed.
(4) Range. The range to the target is given so the gun crew knows how far to look for the target and immediately knows what range setting to place on the rear sight. Range is determined and announced in meters. Since the meter is the standard unit of range measurement, the word "meters" is not announced. With machine guns, the range is determined and announced in even hundreds and thousands. For example: THREE HUNDRED, ONE THOUSAND, ONE ONE HUNDRED. This element may be omitted when the gunners can obviously determine the range; however, it is desirable in some situations to announce the range.
(5) Method of fire. This element includes manipulation and rate of fire.
(a) Manipulation is used to prescribe the class of fire with respect to the gun. It is announced FIXED, TRAVERSE, SEARCH, TRAVERSE AND SEARCH, SWINGING TRAVERSE, or FREE GUN.
(b) To control the rate of fire, the gunner may use single shot, slow, rapid, or cyclic.
(6) Command to open fire. If surprise fire is not desired, the command FIRE is given without pause. It is often important that machine gun fire be withheld for maximum effect of surprise fire. To ensure this, the leader may preface the command to commence firing with the words AT MY COMMAND or AT MY SIGNAL. When the gunner(s) is ready to engage the target, he reports UP to the assistant gunner(s) who signals READY to the leader. For example:
FIRE MISSION.
FRONT.
TROOPS.
AT MY COMMAND. (Pause until crew members are ready and fire is desired.)
FIRE (or appropriate arm-and-hand signal).
When the leader makes a mistake in the initial fire command, he corrects it by announcing CORRECTION, and then gives the corrected element(s). For example:
FIRE MISSION.
FRONT.
TROOPS.
FIVE HUNDRED.
CORRECTION.
SIX HUNDRED.
TRAVERSE.
AT MY COMMAND.
When the leader makes an error in the subsequent fire command, he may correct it by announcing CORRECTION, and then repeating the entire subsequent fire command. For example:
LEFT FIVE, DROP ONE.
CORRECTION
LEFT FIVE, DROP ONE ZERO.
b. Subsequent Fire Commands. If the gunner fails to adjust his fire on the target, the leader must promptly correct him by announcing or signaling the desired changes. When changes are given, the gunner makes the required corrections and continues to engage the target without further command. When firing under the control of a leader, the assistant gunner checks with the leader for instructions, which he passes on to the gunner. Changes in the rate of fire are given orally and by arm-and-hand signals. To interrupt firing, the leader announces CEASE FIRE or gives a signal to cease fire. The gun crew(s) remains on the alert and firing can be resumed on the same target by announcing FIRE. To terminate the alert, the leader announces CEASE FIRE, END OF MISSION.
The purpose of crew exercise is to develop precision, speed, skill, and teamwork in examining equipment, placing the gun into action, and taking it out of action. In crew exercise, precision must be stressed. Once that is attained, speed, skill, and teamwork will follow. Duties are rotated during crew exercise to allow each member of the gun crew to become familiar with all the duties. During crew exercise, all oral or visual signals are repeated. When the fire command is completed, the gunner will give the assistant gunner an UP. The assistant gunner will extend his hand and arm into the air in the direction of the leader (to indicate READY) and announce, UP. With the M3 mount, the crew must consist of at least four men, including the leader. There is no designated crew in the TOE for a dismounted caliber .50 MG. The following paragraphs are only suggestions for the breakdown of equipment and member designation that may be established by the commander.
a. Crew Equipment. In addition to individual arms and equipment, crew members carry the following equipment for the tripod-mounted machine gun:
|
CREW MEMBER |
SUGGESTED MINIMUM EQUIPMENT |
|
Squad or crew leader.
No. 1 Assistant gunner. No. 2 Gunner.
No. 3 Ammunition bearer. |
Binoculars, compass, one box of
Tripod. Receiver, T&E mechanism attached,
Barrel, barrel cover, and box of
|
b. Form for Crew Exercise. The crew leader commands, FORM FOR CREW DRILL.
(1) Positions with equipment. The crew forms in column, facing the crew leader with five paces between men (Figure 5-16). They are in the following order: assistant gunner, gunner, and ammunition bearer. When the crew members reach their correct positions, they assume the prone position with equipment arranged as follows:

(a) No. 1: Tripod to his left, trail legs to the rear, front leg uppermost.
(b) No. 2: Receiver across his front, backplate to the right, retracting slide handle uppermost.
(c) No. 3: Barrel to his right, muzzle to the rear, ammunition box to his left front with latch to the right (latch to the front for the new box).
(d) Other members, if present: Ammunition boxes in front, one foot apart, latches to the right (front).
(e) Crew leader: Ammunition box to his right as he faces the crew, latch to the right (front).
(2) Rotation of duties. Duties are rotated to ensure that each member learns and is capable of performing the duties of the other members.
(a) The command to rotate all personnel is, FALL OUT LEADER. At this command, each member of the crew rises, moves forward, and assumes a new duty. The crew leader becomes the ammunition bearer. The assistant gunner moves forward and becomes the crew leader. The gunner moves forward and becomes the assistant gunner. The ammunition bearer moves forward and becomes the gunner.
(b) If the leader is not changed, the command, FALL OUT ASSISTANT GUNNER, is given. At this command, the crew members rise, the gunner becomes the assistant gunner, the ammunition bearer becomes the gunner, and the assistant gunner becomes the ammunition bearer. When the crew members have assumed their new position, they call out their new duties in order, ASSISTANT GUNNER, GUNNER, AMMUNITION BEARER.
NOTE: An additional crew exercise, which the crew maybe required to practice, is the setting of headspace and timing. These procedures are outlined in paragraph 3-6.
c. Inspection of Equipment Before Firing. When the crew is formed with equipment, the command is, INSPECT EQUIPMENT BEFORE FIRING. At this command, the crew proceeds as follows:
(1) The assistant gunner inspects the tripod M3 mount to ensure that:
(a) The indexing levers and clamps on the front and trail legs function properly, and the legs are in the short (low) position.
(b) The front leg and trail legs are closely folded, and the front leg clamp is hand tight.
(c) The sleeve lock latch and pintle lock release cam are in working order, and the pintle lock release cam is down.
(d) The pintle bushing is free from dirt and burrs.
(2) The gunner inspects the receiver group to ensure that:
(a) The barrel support and breech bearing are free of dirt.
(b) The gun pintle is free of dirt.
(c) The feed mechanism and bolt switch are properly assembled to feed from left (soldier raises cover for proper inspection).
(d) The striker projects through the aperture in the face of bolt (soldier closes the cover).
(e) The rear sight is set at 1,000 yards (900 meters) windage zero.
(f) The T&E mechanism is securely attached to the receiver.
(g) The traversing handwheel is centered.
(h) The elevating screws are equally exposed (about 2 inches) above and below elevating handwheel.
(i) The backplate is latched and locked in place.
(j) The bolt latch release is locked in the down position by the bolt latch release lock.
(3) The ammunition bearer inspects the barrel and ammunition box to ensure that:
(a) The barrel is clear.
(b) The barrel carrier assembly is securely attached to the barrel.
(c) The barrel threads are free of dirt.
(d) The metallic links are clean (soldier opens ammunition box).
(e) The belt is properly loaded and placed in box with the double-looped end up.
(f) Dummy ammunition is used during crew exercise, and no live ammunition is present.
(g) The box is closed and latched.
(4) When the ammunition bearer completes his inspection, he moves to the gunner's position with the barrel in his right hand and ammunition box in his left hand. With the aid of the gunner, he screws the barrel into the barrel extension (Figure 5-17). The headspace and timing adjustment is made. The ammunition bearer remains on the left and on line with the gunner.

(5) The crew leader examines his ammunition as described in paragraph (3).
(6) At the completion of the inspection, a report is rendered as follows:
(a) The ammunition bearer reports: AMMUNITION CORRECT (or any deficiencies).
(b) The gunner reports: GUN AND AMMUNITION CORRECT (or any deficiencies).
(c) The assistant gunner reports: ALL CORRECT (or any deficiencies).
d. Placement of the Gun Into Action. To place the gun into action, the crew leader commands and signals, GUN TO BE MOUNTED HERE (pointing to the position where the gun is to be mounted), FRONT (pointing in the direction of fire), ACTION (vigorously pumping his fist in the direction of the designated gun position).
(1) At the command or signal ACTION, the assistant gunner grasps the left trail leg near the center with his left hand. Springing to his feet and grasping the tripod head with his right hand, he lifts the tripod across the front of his body with the front leg up, and carries the tripod to the desired location. Upon arrival at the position, he places the trail leg pointing upward. Steadying the tripod with his left hand on the front leg, he loosens the front leg clamp with his right hand (Figure 5-18), positions the front leg with his left hand, and tightens the front leg clamp with his right hand. With his right hand on the tripod head, he slides his left hand down on the left trail leg and with a snapping motion, pulls the left leg (to the left), engaging the sleeve latch (Figure 5-19). He then aligns the tripod for direction, drops the mount to the ground, stamps the right and left trail shoes with his right or left foot, and assumes the prone position behind the mount.


(2) The gunner and ammunition bearer move together. When the tripod is nearly mounted, the gunner and ammunition bearer spring to their feet. The gunner places both hands on the spade grips, the ammunition bearer grasp the ammunition box in his left hand and the gun carrying handle with this right hand. Both men lift the gun from the ground and move rapidly to the gun position. Then the ammunition bearer places the ammunition box on line and in front of the leader's ammunition box. The gunner, assisted by the ammunition bearer, inserts the pintle into the pintle bushing. The ammunition bearer stamps the front shoe into the ground with his left foot (Figure 5-20), releases the carrying handle, lowers his right hand, and lifts the gun pintle lock release cam. When the gun pintle is fully seated, he presses down the pintle lock release cam with his right hand, turns to his left, and returns to his original position.

(3) The assistant gunner holds the left spade grip with his left hand. With his right hand, he lowers the T&E mechanism to the traversing bar, ensuring that the traversing handwheel is to the left and the lock lever is to the rear. He then assumes a semiprone position to the left of the gun with his feet to the rear and his head on line with the feedway. He unlatches and raises the cover of the ammunition box, removes the ammunition belt, inserts the double-looped end into the feedway, and taps the feedway with his right hand to ensure it is closed.
(4) With his right hand palm-up, the gunner grasps the retracting slide handle, vigorously jerks it to the rear, and releases it. The gun is half-loaded (Figure 5-21). He then assumes a prone position directly behind the gun with his legs spread and heels down. His right hand lightly grasps the right spade grip with the thumb in position to depress the trigger. His left hand is on the elevating handwheel (palm down) with his thumb near the traversing slide lock lever. He rests on his left elbow with his head as close as possible to the rear sight (Figure 5-22). He then gives the assistant gunner an UP. The assistant gunner announces UP and extends his hand and arm into the air in the direction of the leader.


e. Removal of the Gun From Action. To take the gun out of action, the command is OUT OF ACTION.
(1) The gunner raises the cover with his left hand, the assistant gunner lifts the ammunition out of the feedway, replaces the ammunition in the box, and closes and latches the box. The gunner closes the cover, pulls the retracting slide handle to the rear with right hand (palm up) and releases it, presses the trigger with his right thumb, and loosens the traversing slide lock with his left hand. He rises to his feet, grasping both spade grips. At this time, the ammunition bearer will arrive at the gun position. With his left hand, the ammunition bearer grasps the ammunition box and places his right foot on the front leg shoe. With his right hand, he reaches down and lifts up the pintle lock release cam and grasps the carrying handle (Figure 5-23).

(2) The gunner and ammunition bearer lift the gun from the tripod, turn right, and carry the gun back to their original position. They set the gun down with the muzzle to the left and the retracting slide handle up. The gunner pulls the retracting slide handle to the rear and aligns the lug on the barrel locking spring with the 3/8-inch hole in the right side of the receiver. The ammunition bearer unscrews the barrel from the receiver, picks up the ammunition box and barrel, moves five paces to the rear, places the barrel to his right with the muzzle to the rear and the ammunition box to his left, and assumes the prone position.
(3) The gunner rotates the bolt latch release lock to the right and releases the bolt latch. He checks his sights to ensure they are properly set.
(4) The assistant gunner assumes a kneeling position behind the tripod and releases the sleeve lock latch with his right hand. He rises to his feet, grasps the front leg with his left hand, and rotates the tripod to a vertical position on the trail legs. With his right hand, he loosens the front leg clamp, folds down the front leg, then tightens the clamp. With his right hand on the tripod head, he rotates the tripod on the right trail leg and releases the sleeve latch. Then he folds the left trail leg against the right with his left hand (Figure 5-24). Holding the tripod head with his right hand, trail legs with his left, he lifts the tripod across the front of his body with the front leg up. He turns to the right and returns to his original position. At this time, the crew leader picks up his ammunition box and faces the crew. The assistant gunner places the tripod on the ground, assumes a prone position to the right of the tripod, and announces UP.

f. Duties of The Crew. To hand-carry the gun and equipment, the command is SECURE EQUIPMENT, FOLLOW ME. At this command,--
(1) The crew leader carries his ammunition box in his right hand.
(2) The assistant gunner carries the tripod over either shoulder.
(3) The gunner carries the receiver on either shoulder with the spade grips to the front.
(4) The ammunition bearer carries his ammunition box in his left hand and the barrel in his right hand with the muzzle to the rear (or on his left shoulder with the muzzle to the front).
g. Relocation of Tripod-Mounted Gun. When the gun is mounted on the tripod, it can be moved for short distances by dragging or by a two- or three-man carry. (In the latter, the men should move in step to make carrying easier.)
(1) Dragging. The gun is dragged when there is limited cover, or when the situation requires the gun to be moved in this manner. The gunner and assistant gunner drag the mounted gun to the desired position (Figure 5-25).

(2) Two-man carry. With the gunner on the right and assistant gunner on the left, each grasps the front leg with his forward hand and a trail leg with the other hand, just above the traversing bar (Figure 5-26).

(3) Three-man carry. When the barrel is hot, the gunner gets behind the tripod with a trail leg in each hand. With the assistant gunner on the left and the ammunition bearer on the right, each grasps the carrying handle. In addition, the assistant gunner carries the ammunition in his left hand (Figure 5-27). When the barrel is cool, the ammunition bearer and the assistant gunner each grasp the front leg (Figure 5-28).


NOTE: Carrying the gun by the barrel may cause damage to the barrel support and the barrel extension.
h. Movement of the Gun to Other Mounts. With the mount prepared to receive the gun, the cradle of the mount is placed in a horizontal position. To move the gun to the mount, the gunner carries the right spade grip in his left hand and a box of ammunition in his right. The assistant gunner grasps the carrying handle with his left hand and a box of ammunition in his right hand. When they get to the mount, the gunner and assistant gunner place their ammunition boxes near the mount. The gunner removes the rear mounting (gun-locking) pin with his right hand. The assistant gunner removes the front mounting (gun-locking) pin with his right hand. They place the gun on the mount. The gunner aligns the holes in the rear mounting lugs of the receiver with the rear mounting bracket and inserts the rear mounting pin. The assistant gunner aligns the front mounting hole in the front of the receiver with the front mounting bracket and inserts the front mounting pin. (For use of the sideplate trigger with the M63 mount, see TM 9-1005-213-10.)
The machine gun fundamental skills test should be held periodically to ensure that proficiency with the MG is maintained by all crewmen. It consists of 10 fundamental skills; all tasks are hands-on (Figure 5-29). The test should be given prior to range firing on a go/no-go basis.

This phase of training is designed to allow the gunner to apply the fundamentals of marksmanship that he learned earlier. During this training, the gunner is introduced to the basic machine gun target (see Appendix C), procedures for both the 10-meter and field fire ranges, and how to acquire targets. He also fires practice and qualification.
The concept of zero is very simple; it is no more than the best way to adjust the sights of the weapon so the point of aim of the sights and the point of impact of the rounds are the same at any given range. A properly zeroed M2 gives the gunner the highest probability of hit for most combat targets with the least adjustment to the point of aim. There are three methods of zeroing/targeting used with the .50 caliber MG.
a. Ten-meter zero is the basic and the most common method of zeroing the M2 MG. Once zeroed on a 10-meter range using the standard machine gun target, the weapon is ready for field fire. As other weapons, the sight on the M2 must also be set at an initial start point (Figure 5-30). The initial sight setting for field zero is basically the same; except the range setting during field zero will depend on the range to the target, and it is always 1,000 yards for 10 meters.

(1) Set elevation. Raise the rear sight by lifting straight up until it snaps into the upright position. Adjust the range scale to 1,000 yards by rotating the elevation screw knob in the necessary direction. (Clockwise moves the scale up; counterclockwise moves the scale down.)
(2) Set windage. Rotate the windage knob until the zero index mark on the base rear sight is aligned with the index mark on the top of the receiver. (Clockwise moves the windage scale to the left; counterclockwise moves it to the right.)
(3) Obtain proper sight picture. Obtain the proper sight picture by looking through the zero aperture and centering the front sight blade in it. Once the sight alignment is obtained, place this combination on the center base of the selected target (Figure 5-31).

b. Field zeroing/targeting is an expedient method of obtaining a zero when a 10-meter zero cannot be conducted. When preparing to field zero, make sure the M2 is mounted securely on the M3 tripod, make sure the T&E is working properly, and finally, know the distance to your zero target. The only difference in initial sight setting for field zero is range setting on the scale. The gunner must also remember that the range scale on the M2 is indicated in yards. Therefore, in order to get as close to the target as possible, you may have to convert the meters to the target into yards so you can set the range on the rear sight. Conversion of meters to yards is accomplished by multiplying the number of meters by 1.094. For example, 600 meters x 1.094 = 656.4 yards; the gunner would set his range scale at 650.
c. The AN/TVS 5 is an effective night fire aid. By using this device, the gunner can observe the area and detect and engage any suitable target. But, as usual, the device is only as good as its zero; the zeroing procedure requires practice to become proficient.
(1) Mount the mounting bracket. To mount the bracket, the gunner must ensure that the rear sight is in the down position. He then releases the catch on the left side of the top cover assembly and raises the cover to the upright position. He pushes the mounting bracket over the breech of the machine gun and slides the bracket rearward until it stops (Figure 5-32).

He pushes the three locking cams to secure the bracket (Figure 5-33) and closes the top cover assembly.

(2) Install the sight on the mount. To install the sight, the gunner must align the scribe lines on the sight with the scribe lines on the bracket. He places the sight in the groove at the top of the bracket and tightens the lever screw to secure the sight to the bracket (Figure 5-34).

(3) Zero the AN/TVS-5. A gunner must zero the MG with its NVD on it before he can effectively engage targets with the AN/TVS-5. The zeroing of this device to the MG must be done at 50 meters. An M16A1, A2, or Canadian bull zero target may be used. The point of impact for either target must be 9.8 centimeters below the target aiming point. To accomplish this task, place the reticle aiming point on the target aiming point (Figure 5-35).

(a) Fire enough single-shot rounds to obtain a good shot group. Locate the center of the shot group. Adjust the AN/TVS-5 azimuth and elevation knobs until the shot group impacts 9.8 centimeters below the target aiming point. Move the weapon so that the reticle aiming point is again on the target aiming point. Repeat this process until the desired point of impact is obtained.
(b) When adjusting, move the azimuth or elevation adjustment actuator one click to move the strike of the round .5 inch at 50 meters. One click of adjustment will move the reticle about one square on the Canadian bull-type target.
NOTE: The lens cover with the peephole may be required to prevent scope washout from the muzzle flash.
(4) Dismount the sight. The gunner dismounts the sight from the bracket first by loosening the lever screws. Then he lifts the sight from the bracket. He must then dismount the bracket in the reverse mounting procedure.
The purpose of 10-meter firing is to develop skills in the delivery of initial burst on target. When conducted properly, it will train gunners in the basic skills, such as 10-meter zero, controlled bursts, traverse, and traverse and search firing techniques. (See Appendix C for details on setup and conduct of firing.)
Transition day firing of the M2 machine gun will teach the gunner some techniques of fire that he may encounter in combat situations. The gunner will field zero his weapon and engage point and area targets from the tripod-mounted firing position. Within this training, the gunner will be required to apply all the fundamentals of gunnery learned in preparatory gunnery training and 10-meter firing. (See Appendix C for details on the setup and conduct of transition day fire.)
Since NBC plays an important part in our preparation for war on the modern battlefield, it is important that each soldier is prepared to accomplish the mission even if the area is contaminated and he must wear protective gear. (See Appendix C for details on setup and conduct of fire.)
The night fire exercise gives the soldiers the practical application of engaging targets using the AN/TVS-5 at night or during limited visibility. (See Appendix C for details on setup and conduct of fire.)
After firing 10-meter, day, NBC, and night, gunners need practice in applying what they have learned. They also need experience in engaging targets that depict realistic enemy formations. Advanced gunner exercises provide this experience in mounted, mounted NBC, and predetermined firing exercises.
The objectives of the advanced gunnery phase are to prepare the gunners for combat. During this phase, training should be directed toward--
The gunner normally completes instruction in firing at stationary targets before he receives instruction in firing at moving targets. The technique of engaging a moving target differs from that of engaging a stationary target. The gun must be aimed ahead of the moving target a sufficient distance to cause the bullet and target to arrive at the aiming point at the same time. The distance is measured in target lengths. One target length as seen by the gunner is one lead. Leads are measured from the center of mass. The lead depends upon range, speed, and direction of movement of the target. To hit the target, the gunner aims at a point ahead of the target equal to the estimated number of leads, maintains the lead by tracking the target (manipulating the gun at the same angular speed as that of the target), and then fires. Fire is adjusted by observation of strike/tracer (Figure 5-36).

a. Tracking. Tracking consists of maintaining correct alignment of the sights (with or without a lead) on a moving target by moving the gun at the same angular speed as that of the target.
(1) The gunner is required to aim at a prescribed point (center base to take advantage of the beaten zone) on the target and maintain that aim during uniform movement of the target. As instruction progresses, speeds used should differ for successive runs of the target. The speeds the 10-meter targets should move to represent speeds at various ranges are shown in Table 5-2.

(2) The target handler must have practice in moving the target silhouette across the background at the varying speeds.
b. Leading. Mathematical computation or use of voluminous lead tables to obtain exact leads on a moving target are impractical in combat. The simple lead table shown in Table 5-3 gives the amount of lead necessary to hit a target moving at right angles (90 degrees) to direction to hit at speeds and ranges indicated.

(1) The gunner must correct the lead as conditions change. If the target speed is 7 1/2 miles per hour, the amount of lead is half that shown in the table; at 30 miles per hour, double that shown, The angle at which the target is moving also alters the amount of lead taken. If the angle between line of fire and line of travel of the target is less than 45 degrees, use half the lead shown in the table.
(2) For targets moving directly toward the gun, the point of aim is placed on the center or the lower edge of the target, when possible. For targets moving directly away from the gun, the point of aim is placed on the center or upper edge of the target. Too much lead is better than too little because the target runs into the fire; also, the observation of strike is easier. Intelligent use of the lead table includes immediate application of fire with estimated lead followed by necessary corrections based upon observation of strike/tracer.
c. Tracking and Leading. Combined tracking and leading exercises at 10 meters are used to gain proficiency in tracking the target. The gunner is required to repeat the tracking exercise while using a designated lead to simulate firing when his sights are properly aligned. As a further exercise in tracking and leading, the gunner may be required to track and lead moving targets at greater ranges. A vehicle can be run at right angles to the line of aim at ranges between 500 and 1,000 yards, and at varying speeds, averaging 15 miles per hour (Figure 5-37).

d. Conducting the Lead Exercise (10-Meter). The gunner is required to take a position at the gun, swing through the target's silhouette, and aim at a point ahead of the target equal to the prescribed lead from the center of mass. The gunner then directs the target handler to move the marking silhouette until the center of the target is at the point of aim. He repeats this procedure three times for each target lead announced. The target handler places his marking silhouette on the blank background, traces around it, and holds it in place for the gunner to aim, using the prescribed leads. Following the gunner's instructions, he moves the marking silhouette until the gunner commands HOLD. He then places a pencil dot at this point and returns the silhouette to the original position. This procedure is followed until the gunner has completed three tries for each target lead announced. The three pencil dots for each target should fit within a one-centimeter circle. The exercise should be conducted for varying left and right leads.
The purpose of the mounted firing exercise is to teach the gunner techniques of firing the M2 MG from a mounted platform and to develop the gunner's ability to fire the M2 with it mounted on its primary carrier. (See Appendix C for details on the setup and conduct of fire.)
The probability of fighting mounted in a tactical environment that has been contaminated by NBC agents is very likely; therefore, gunners must be trained to engage targets while in a mounted NBC posture. (See Appendix C for details on the setup and conduct of fire.)
The predetermined firing exercises are designed to instruct the gunners on preparing and using range cards during any visibility conditions. (See Appendix C for details on setup and conduct of fire.)